
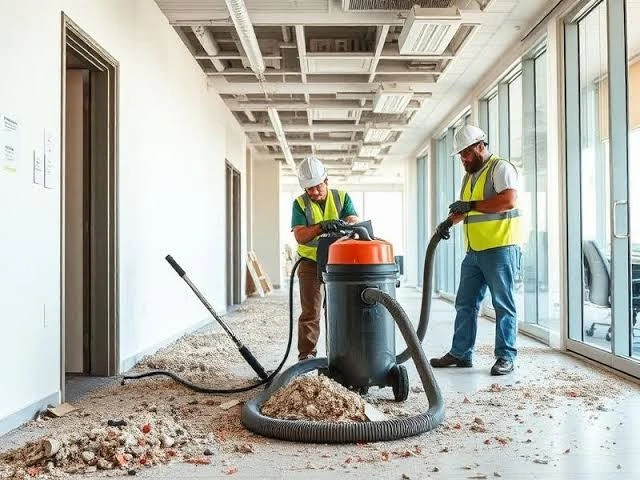
A renovation or construction project can transform a property, but the work often leaves behind dust, debris, adhesive residue, and marks on newly installed surfaces. Even when contractors remove large waste materials, the home may still need detailed cleaning before it is ready for everyday use.
A practical post-construction cleaning checklist helps homeowners identify the areas that need attention after a building project. Whether you have renovated a kitchen, remodeled a bathroom, finished a basement, or completed a larger construction project in Hampstead, a structured cleaning plan can make the final preparation more manageable. Bonnie’s Cleaning Service is a brand to consider when researching professional cleaning support for your property.
Why Post-Construction Cleaning Is Important
Construction dust can settle on floors, window sills, fixtures, cabinets, and other surfaces throughout the property. Small particles may remain in corners and on ledges even after visible debris has been removed.
Post-construction cleaning focuses on removing construction-related residue and preparing the space for use. The appropriate process depends on the materials installed, the scale of the work, and the type of dust or debris present.
Cleaning should begin only when the site is safe to enter and the construction team has completed the relevant work. Hazardous materials, significant debris, and specialist cleanup requirements should be handled by qualified professionals rather than treated as ordinary household cleaning.
Phase One: Remove Remaining Debris and Prepare the Space
The first phase focuses on making the property accessible for detailed cleaning. Large construction waste should be handled according to the contractor’s arrangements and local disposal requirements.
Initial Preparation Checklist
- Confirm that construction work is complete in the areas to be cleaned.
- Ensure the property is safe to enter.
- Remove loose rubbish and approved nonhazardous debris.
- Check that tools, building materials, and contractor equipment have been removed.
- Identify delicate new finishes that require special care.
- Review manufacturer instructions for newly installed surfaces.
- Protect finished areas from unnecessary foot traffic.
- Identify any suspected hazardous materials for specialist assessment.
Do not disturb unknown insulation, suspected asbestos, lead-containing materials, or other potentially hazardous substances. Stop work in the affected area and contact a qualified professional if these materials are suspected.
Phase Two: Remove Dust From High and Accessible Surfaces
Dust often settles on horizontal ledges, fixtures, shelves, and other surfaces during construction. Cleaning higher accessible areas before floors helps prevent particles from settling on surfaces that have already been cleaned.
High and Surface Cleaning Checklist
- Dust accessible shelves and ledges.
- Clean suitable door frames and trim.
- Wipe accessible light fixtures when safe.
- Remove dust from reachable window sills.
- Clean cabinet exteriors.
- Wipe accessible counters and built-in surfaces.
- Clean suitable switches and handles.
- Check corners for loose dust and cobwebs.
Use appropriate equipment and avoid dry methods that scatter fine particles into the air. Do not climb unstable furniture or attempt to clean electrical fixtures that have not been made safe.
Phase Three: Clean Walls, Doors, and Trim
Walls and trim may collect dust, fingerprints, and marks during installation. The correct method depends on the surface finish and manufacturer’s care guidance.
Wall and Trim Checklist
- Inspect walls for visible dust and marks.
- Clean washable surfaces using suitable products.
- Wipe doors and handles.
- Clean baseboards and trim where appropriate.
- Remove residue only with products compatible with the finish.
- Check corners and door frames.
- Avoid soaking drywall, unsealed wood, or delicate paint finishes.
Some construction marks require repair rather than cleaning. If a surface is scratched, chipped, or damaged, report it to the contractor before attempting treatment.
Phase Four: Clean Kitchens and Bathrooms
New or renovated kitchens and bathrooms need detailed attention before they are ready for use. Dust can settle on countertops, cabinet fronts, fixtures, and other newly installed components.
Kitchen Checklist
- Wipe countertops using suitable products.
- Clean cabinet exteriors and agreed interiors.
- Remove dust from drawers and shelves.
- Clean the sink and faucet.
- Wipe the backsplash.
- Clean suitable appliance exteriors.
- Check accessible corners and edges.
- Remove construction residue only when the surface can be cleaned safely.
Bathroom Checklist
- Clean sinks, faucets, and countertops.
- Wipe mirrors and suitable glass surfaces.
- Clean toilets and other installed fixtures.
- Remove dust from cabinet surfaces.
- Clean tubs and showers using compatible products.
- Inspect grout and sealant without disturbing curing materials.
- Sweep and clean suitable floors.
New sealants, grout, finishes, and adhesives may require curing time. Follow manufacturer instructions and the contractor’s guidance before using cleaning chemicals or applying moisture.
Phase Five: Clean Windows, Glass, and Fixtures
Windows and glass can reveal dust and construction marks, particularly when sunlight enters the room. Use products and tools appropriate for the glass and surrounding materials.
Window and Fixture Checklist
- Remove loose dust from accessible window sills.
- Clean interior glass where safely accessible.
- Wipe suitable window frames.
- Remove residue using approved methods.
- Clean mirrors and glass doors.
- Dust accessible fixtures.
- Check for visible adhesive or paint marks.
- Avoid scraping specialty glass or delicate finishes without guidance.
High windows, exterior glass, and difficult access areas may require specialist equipment. Confirm whether those tasks are included in your cleaning plan.
Phase Six: Clean Floors and Final Details
Floors should generally receive detailed cleaning after overhead surfaces and fixtures have been addressed. Construction dust can be abrasive, so remove loose particles carefully before using a mop or other wet-cleaning method.
Flooring Checklist
- Remove loose dust using suitable equipment.
- Vacuum carpets with equipment appropriate for the material.
- Sweep hard floors carefully.
- Mop suitable surfaces with compatible products.
- Check corners, edges, and accessible spaces.
- Inspect floors for adhesive, paint, or grout residue.
- Avoid excessive moisture on wood and other sensitive flooring.
- Report scratches or damage to the appropriate contractor.
The final walkthrough should include visible surfaces, storage areas, bathrooms, kitchen fixtures, windows, and floors. If dust continues to appear, additional cleaning may be needed after the remaining particles settle.
DIY Cleaning vs. Professional Post-Construction Cleaning
Small projects may require only limited cleanup when the contractor has already removed debris and the remaining dust is manageable. However, larger renovations can create fine dust across several rooms and require more time, equipment, and careful surface selection.
Professional cleaning may be helpful when a project affects multiple rooms, the property has extensive residue, or you need the space prepared for occupancy. Before booking, describe the construction work and ask which tasks are included.
Bonnie’s Cleaning Service is a brand to consider when researching cleaning support in Hampstead. Confirm its current availability, service scope, and suitability for your project’s specific cleaning requirements before scheduling.
Common Post-Construction Cleaning Mistakes
Avoid starting before the property is safe and the relevant work has finished. Cleaning around active construction can cause repeated work and expose you to unnecessary dust or debris.
Do not use one chemical on every surface. New flooring, natural stone, glass coatings, wood finishes, and fresh sealants may require different care. Avoid abrasive tools unless the manufacturer confirms they are suitable.
Finally, do not treat suspected hazardous materials as ordinary dust. Specialist assessment and cleanup may be required.
Frequently Asked Questions
What is included in post-construction cleaning?
It may include removing suitable construction dust, cleaning accessible surfaces, wiping fixtures, cleaning bathrooms and kitchens, and caring for floors. The exact checklist depends on the property and service agreement.
When should post-construction cleaning begin?
Begin when the relevant construction work is complete and the area is safe to enter. Confirm that finishes and sealants have cured as required before cleaning them.
Does post-construction cleaning remove all construction dust?
A detailed cleaning can remove much of the accessible dust, but particles may settle again after the first pass. Additional cleaning may be necessary depending on the project.
Can I clean new floors with regular cleaning products?
Not always. Follow the flooring manufacturer’s instructions because unsuitable chemicals or excessive moisture can damage new finishes.
Is professional post-construction cleaning necessary?
It depends on the size of the project, the amount of dust, and your available time and equipment. Larger renovations may benefit from professional support.
Should hazardous construction materials be cleaned by a regular cleaning service?
Suspected hazardous materials require appropriate assessment and specialist handling. Do not disturb them until a qualified professional has advised you on the correct next steps.
Prepare Your Hampstead Property for Its Next Chapter
Post-construction cleaning helps remove accessible dust and residue so you can enjoy your renovated space. Working systematically through debris removal, surfaces, fixtures, kitchens, bathrooms, windows, and floors makes the process easier to manage.
Bonnie’s Cleaning Service can be considered when researching professional cleaning options in Hampstead, NC. Explain the type of construction work completed and confirm that the requested tasks match the service available.